Overview
Here is a quick overview on where many of the edits within WordPress take place when using the Swank Theme.
*Note: Depending on the final layout of your theme, some locations may differ. When adding images, be sure to use the recommended size provided by your Project Manager.
Slider
The Swank Theme uses the Genesis Slider which is very easy to manage.

*Note: Be sure to always crop your slider to the recommended image size before uploading.
Add New Slide
Be sure to do the following:
- Add Title
- Add Featured Image (crop to the recommended size prior to uploading)
- Link Slide
- Click Slideshow Location
- Fill in SEO by Yoast Meta Description
- Publish
- Check your Live Site

Edit Existing Slide

Widgets
The Widgets area of WordPress is where you will make the following edits to your site:
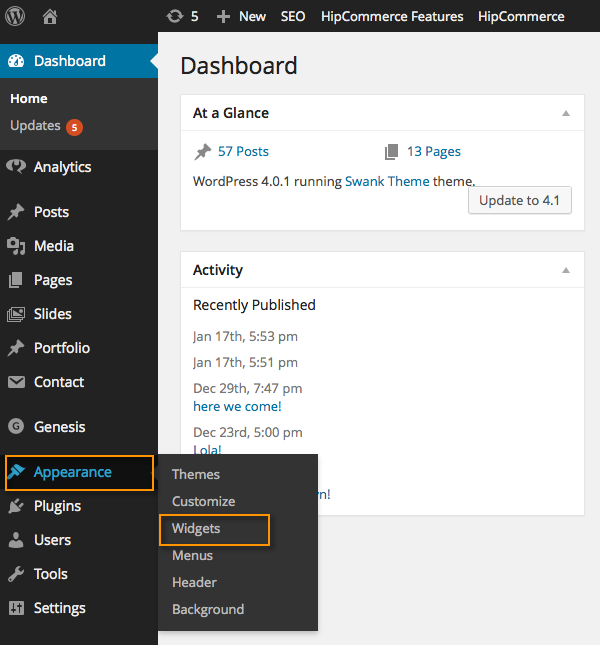
Social Media Icons:
Whether your social media icons are in the header or footer, you can easily add to or remove social media icons using the Simple Social Icons Widget.
*Note: Expand the appropriate widget (top bar left, footer 1, footer 2...).
![]()
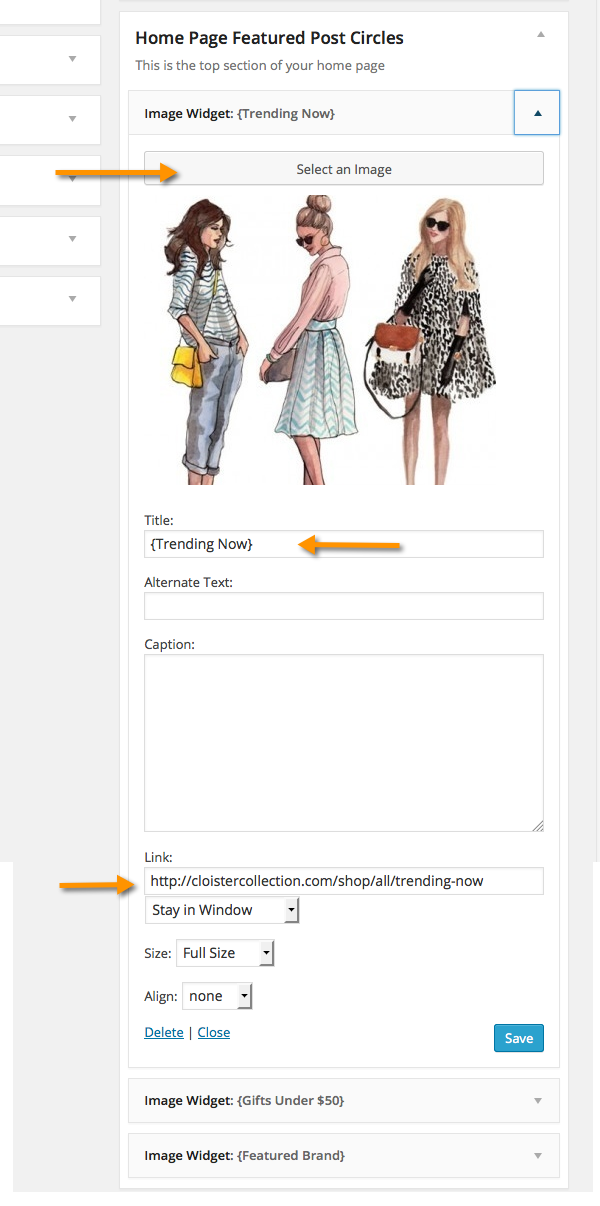
Homepage Images:
The images below the slider are updated in the Home Page Featured Posts Circles widget (whether your images are circles or squares).

Do the following:
- Expand the Image Widget you want to replace
- Click on Select an Image
- Add Title (optional - but if you use, you MUST add title for all images)
- Caption (optional - only use adding text below all your images)
- Link your image
Homepage SEO TEXT:
Update text within the TEXT widget. Besure to keep the <p>...</p> html tags:

Blog
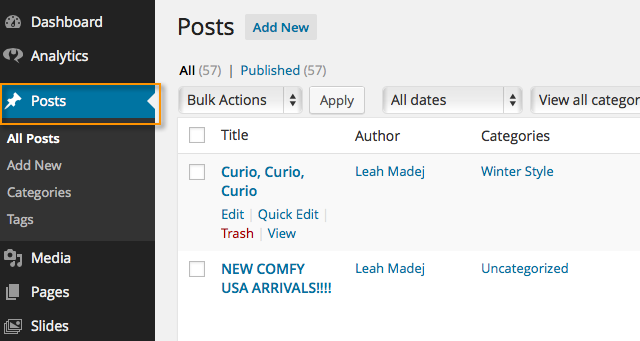
When Blogging, log into WordPress to the Posts section. Be sure to do the following:
- Add Title
- Add Content & Images
- Add Featured Image (if your layout required it)
- Check off Category
- Fill In WordPress SEO by Yoast
- Publish
- Check your Live Post
Here's a link to a Help Page with more information on Creating Posts: Blogging & Creating Posts
If you need additional help, be sure to submit a support ticket.