Overview
Rich Pins allow you to include pricing and availability information about your products in Pinterest. This makes it easier for Pinterest visitors to find and buy the stuff they like. With Rich Pins, visitors see a logo, which is really the favicon from your website, under your products in Pinterest.

You'll also notice a new Stock Status and Price showing up for your products inside of Pinterest.
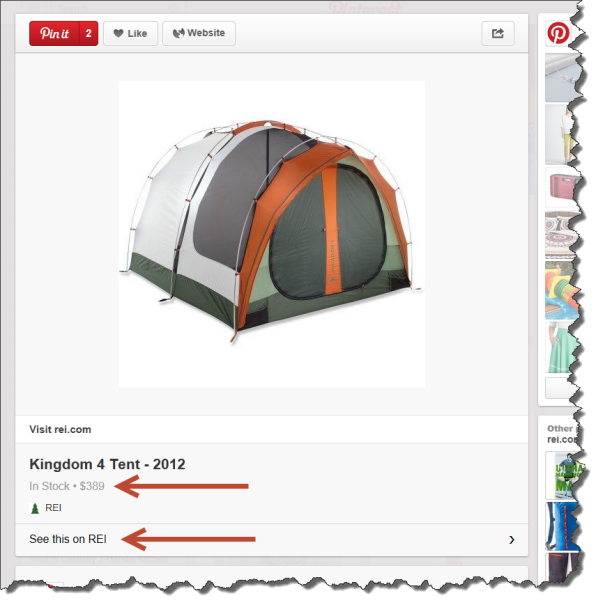
Of course, clicking on the item in Pinterest takes the visitor directly to your website where they can purchase the product.

You can read more about Pinterest Rich Pins here:
Website Setup
Rich Pins work by Pinterest reading some unique Meta tags about your product. These tags are filled in for every product in your catalog. Please submit a Support Request in Store Manager if you'd like Modern Retail to configure Rich Pins on your website; for many sites, the tags are already there for you to complete the setup in Pinterest.

Pinterest Setup
In order for Rich Pins to work, you must tell Pinterest you have enabled it on your website. Pinterest will take you through a verification process to make sure you have correctly configured your website to accept Rich Pins.
- Login to Pinterest
Go to Pinterest and login with your business account. If you don't have a business account, convert your personal account or create a business one.
http://business.pinterest.com/en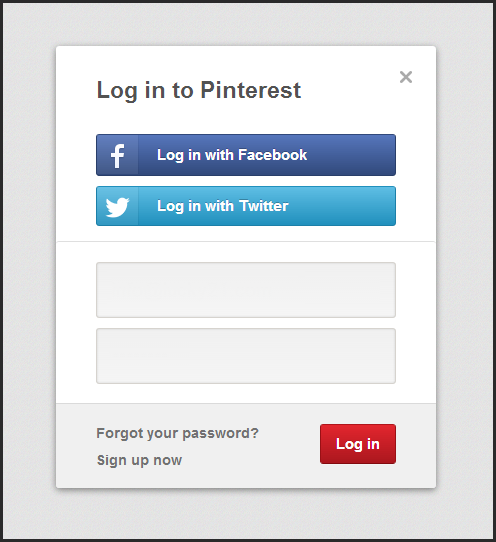
- Rich Pins Validator
The Rich Pins Validator is located at:
http://developers.pinterest.com/rich_pins/validator/
Once there, you will need to enter the URL of a product page in your website.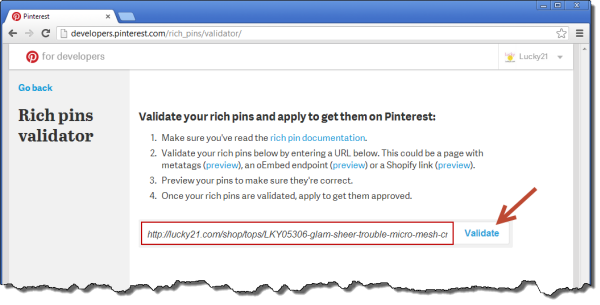 You must enter the address of a product page within your website. Entering the address of your homepage or any other page that is not your product page will not work because it will not include the required fields for Pinterest about your products (stock status, price, etc.).
 - Apply Now
After you have entered a URL for your product page and hit Validate, you should be greeted by Your pin's been validated! Just one more step is required and that's to hit the Apply Now button.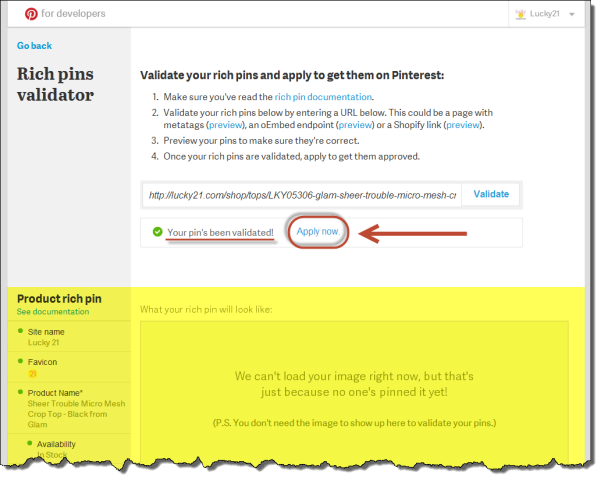
- Confirmation
Your application has not been accepted until you see a confirmation similar to the following.
- Pin it Button
The last step in the setup is to add the Pinterest "Pin it" button to the product pages in your website. This button quickly allows your visitors to pin your pictures directly to their boards in Pinterest.
If you need help with this setup or have any questions, please let us know by submitting a Support Request.