Overview
Modern Retail's Magento Integrator connects Magento to your third party POS/ERP system, (a service like CounterPoint, RunIt, RICS, etc.) via Modern Retail's Integration Middleware. What this means in plain english is that the integrator carries your data (Orders, shipping information, and payment information) to where it needs to go. In this article we'll go screen by screen to look at everything you can see in Modern Retail's Magento integrator.
Finding the Magento Integrator
You can find our integrator in the Magento backend. Click on the Modern Retail icon in the sidebar to pull up the integrator options:

We'll go through each of the pages here; Jobs Queue, API, Integrator, and Integrator Settings.
Jobs Queue
The work that the Integrator actually performs is done in the form of "Jobs". Each Job the integrator performs is the process of moving data like orders, shipping information, or payment information to your POS system. The Jobs Queue displays the jobs the integrator has performed in an ordered list, pictured below.

In the leftmost column on this page you can select jobs. You can then use the Action dropdown in the top left to perform an action on the selected jobs.
The Type column is where you can see which type of job each entry is. Clicking on Type will sort the list by the job type. Similarly, you can click on the top of any other column to sort by that information.
The Entity ID column displays the entity ID associated with that job. The Number column shows which number the job is. The Status column shows the status of a job-as you can see in this screenshot, these are mostly Completed or Scheduled.
The Scheduled At and Sent At columns reflect the dates on which each job was scheduled and sent to the integrator, respectively. Lastly, you can click on Request & Response in the last column to get the technical details on the job.
If you click on the Filters button on the right, over the job list, you can set filters to only see certain jobs.

You can set the filter to only show jobs undertaken during a certain time period, or within a certain range. Enter the relevant information in the correct textboxes, and then hit Apply Filters to narrow your search.
Integrator
The main Integrator page is where we can upload files for the integrator to process.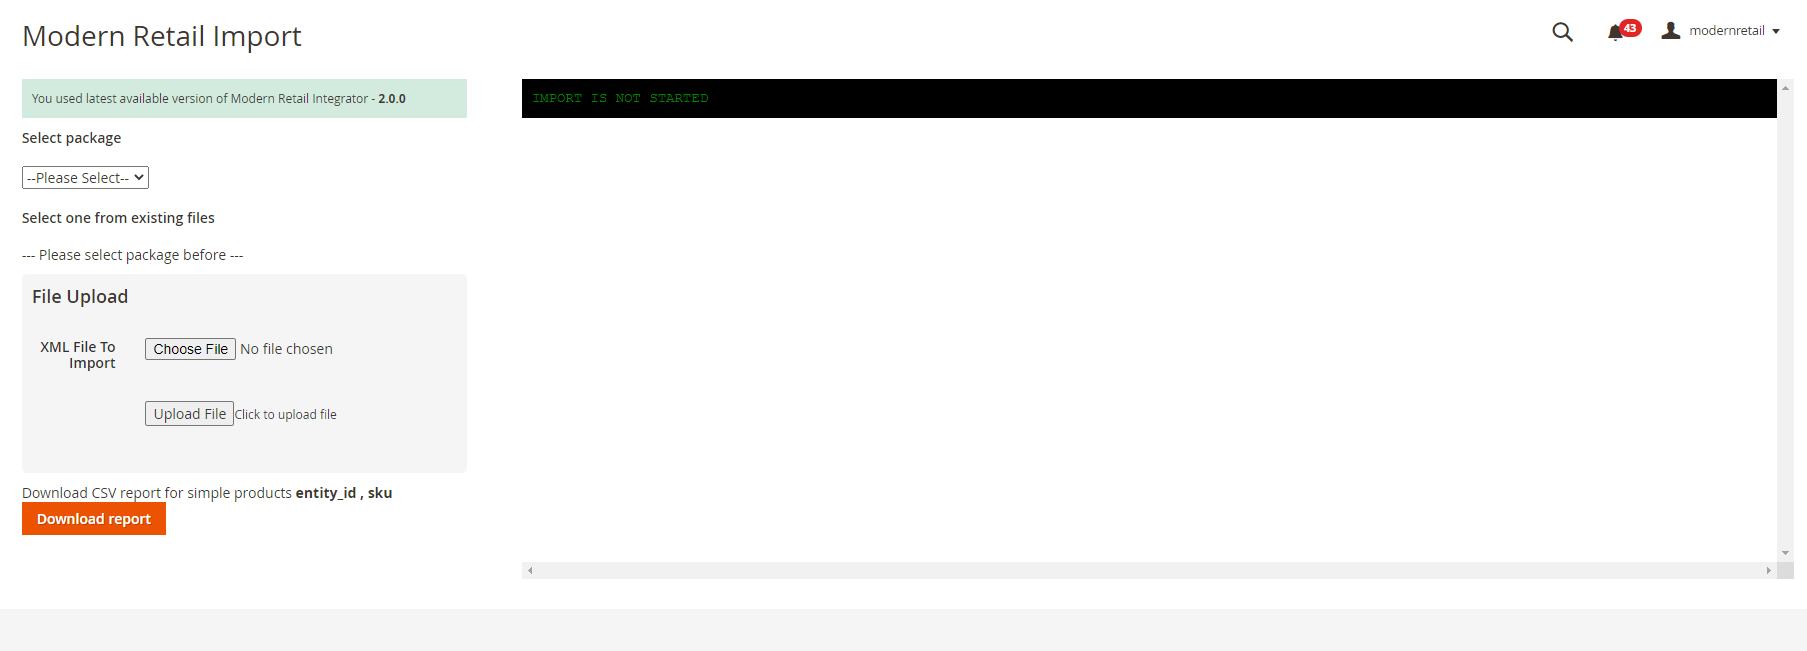
The blank space on the right is where the Integrator will sum up what it's done. On the left you can select the files to integrate; you can either pick something from the Select Package drop down, or upload a file in the File Upload section. Selecting Download Report allows you to download the report of the integrator's actions.
Integrator Settings
The last page we'll look at here is the Integrator Settings page. Clicking on Integrator Settings will take you to the integrator settings menu for Magento. The majority of these will be handled during your onboarding process, where our team will work with you to make sure everything works for your business. That being said, we'll go over some of the important stuff here.
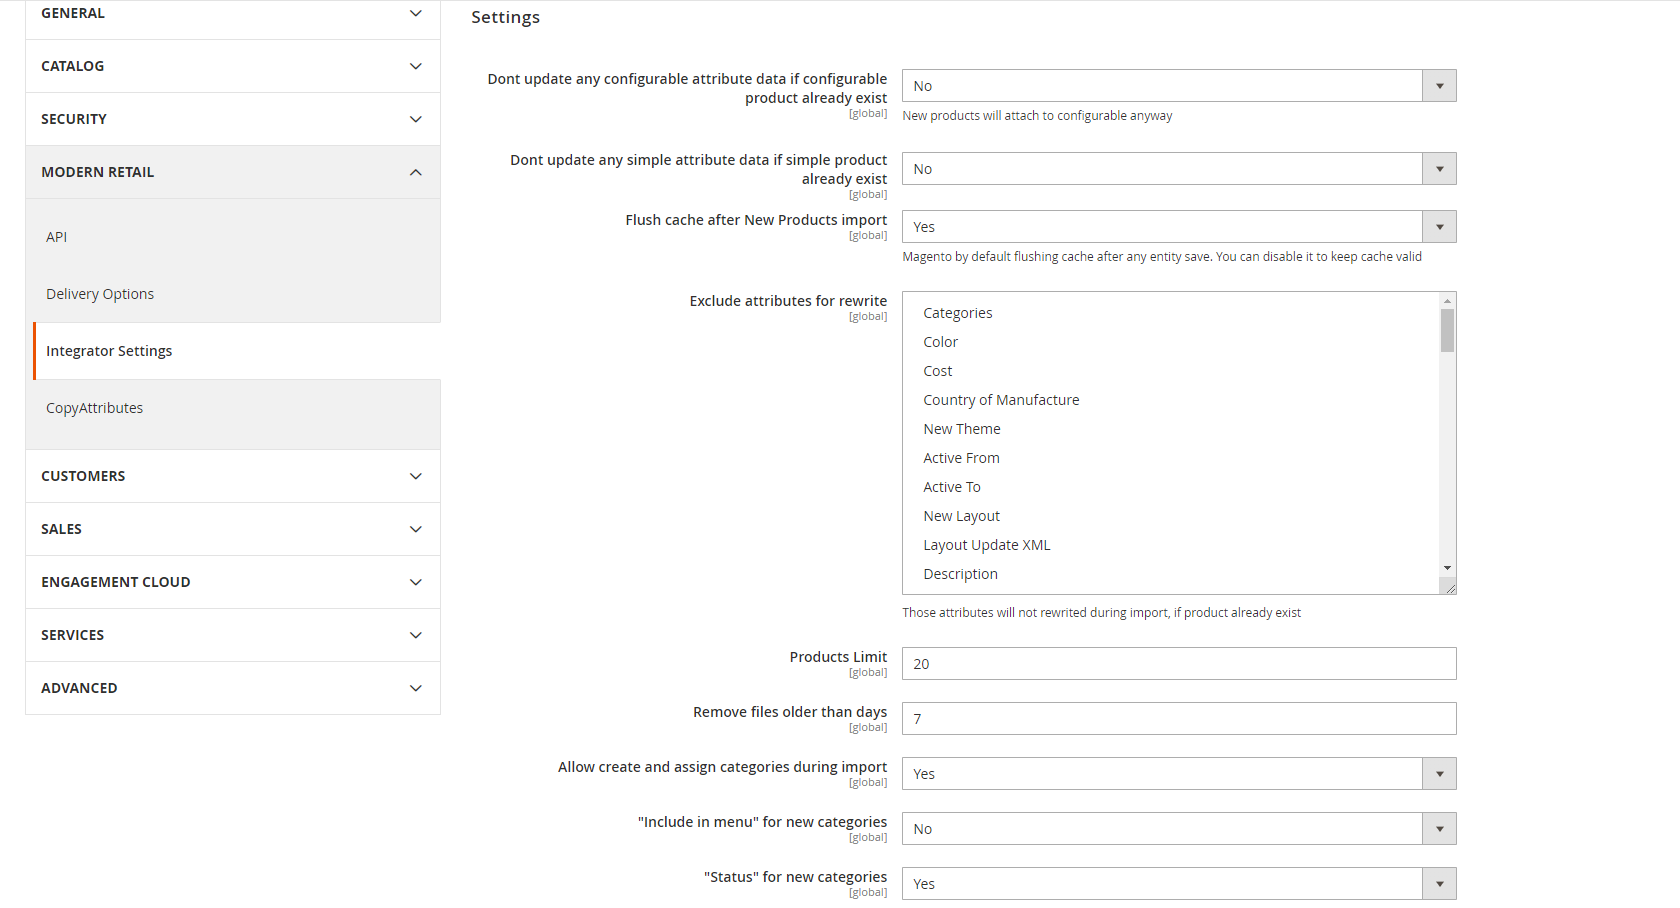
This first block of settings primarily concerns itself with how new products are integrated. It's unlikely you'll have to familiarize yourself with any of these after the initial setup.
Below this is a table for attribute mapping, seen below:
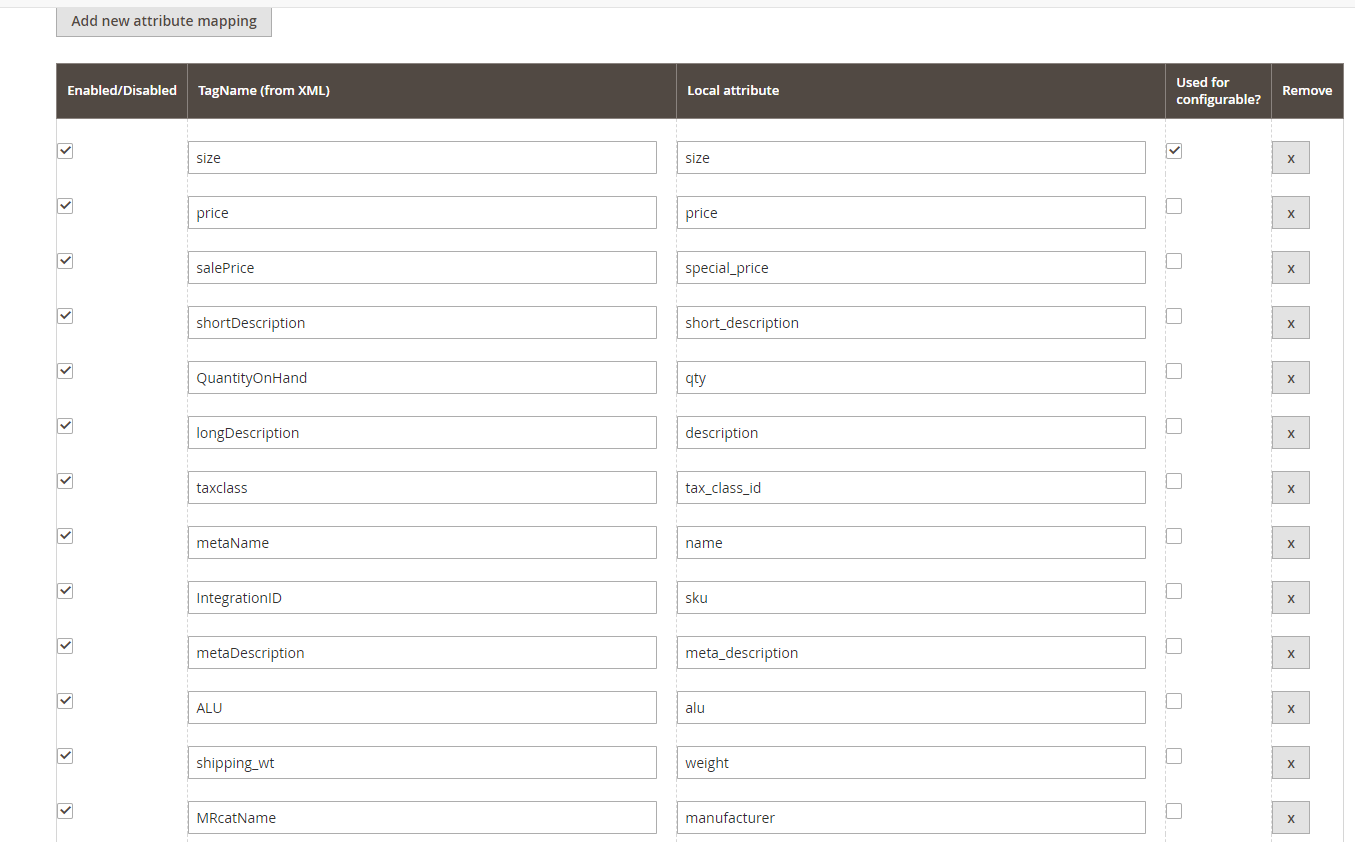
Attribute Mapping is a key part of how our integration software works. You can think of this as a sort of translation guide for Magento; what it says in the Local Attribute column is the Magento version of the attribute, and the TagName column is how the attribute is recorded in the file you're uploading to the integrator. Most of these will be set up during the onboarding process, but you can click on the Add New Attribute Mapping to set up a new "translation". You can enable or disable a mapping by using the checkbox in the Enabled/Disabled column. You can remove things by clicking on the "x" in the Remove column.
Scrolling further down on this page will show you the Configurable Product Mapping and Update Product Mapping sections, which function the same as the attribute mapping section above.
If you have any further questions about the Magento Integrator, please get in touch with us via a support request.