Overview
Admittedly, product photography is probably the most difficult task you'll need to preform on your website. Luckily this has gotten easier over the years as most people know how to use digital cameras and how to "style" their products to create great-looking shots.
Funny Side Note: When Modern Retail first stated building websites digital cameras were new. None of our customers owned a digital camera and they certainly didn't know how to use it. Back then we had to help our customers setup their cameras and show them how to use it.
This help page will show you how to create consistent-looking images for your website, how they can be uploaded to Store Manager and how to "process" them once you're ready to make them live on your website.
Cropping Images
Many retailers prefer to have consistently-sized images on their website. To achieve this you must make sure you images are of a consistent size before they are uploaded to Store Manager. Very often this means you must crop your product catalog images to a specific size, or dimension, before they are uploaded.
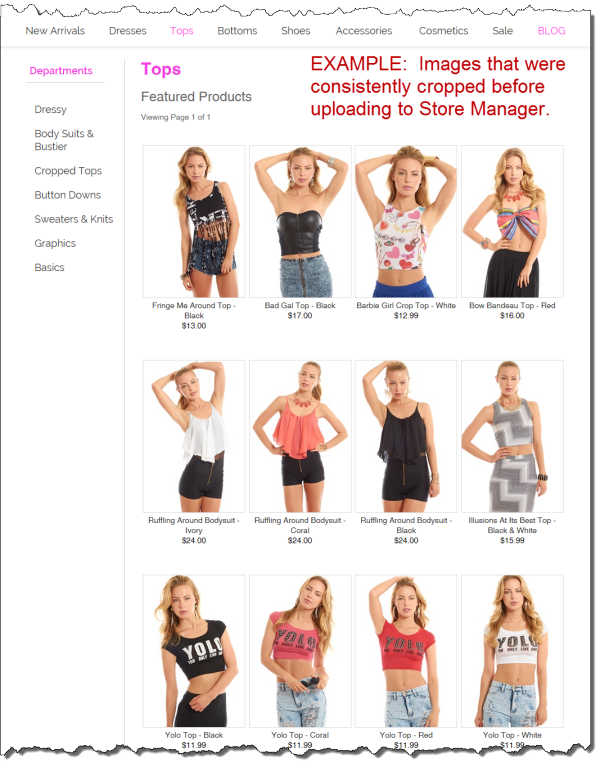
Here is an example of a site where all the images were cropped to a consistent size before uploading to Store Manager.
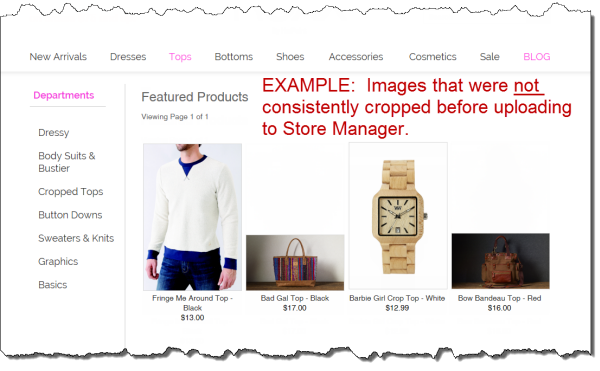
Here is a mockup of the same site using images that were not cropped to the same size. As you can see some of the images uploaded to Store Manager were wider, while others are shorter.
Ideally all images you upload to Store Manager should be of a consistent size. This includes all alternate or enlarged views of the products in your catalog.
If you interested in having consistently sized images on your site but are unsure what size your images need to be cropped to, then please go ahead and upload a dozen or more images from your catalog from a variety of different departments and your project manager will help you determine the appropriate size.
Photography Software
There's a bunch of really good software out there to not only help you crop your images, but also make improvements to your photographs like red eye removal, color corrections, light balance, etc. The industry standard is most certainly Adobe Photoshop and would most likely be the tool used by your photographer or graphic designer. However, Photoshop may be overkill for smaller retailers or those not familiar with high-end tool. Instead, you may want to consider Photoshop's easier sibling, Photoshop Elements or the free image editing tool from Google called Picasa.
|
When uploading images to Store Manager you'll want to make sure you resize all your images to 1200 pixels wide. This does two things for you: (1) it will speed up the upload time because the file size of the image will be smaller and (2) not cause problems for Store Manager when you try to process your images because Store Manage cannot process images over about 2 MB. Please make sure you resize your images to 1200 pixels wide and always save your images in a JPG format before uploading. |
Uploading Images
Images can be uploaded right from the Edit Product page by clicking on Upload Image.
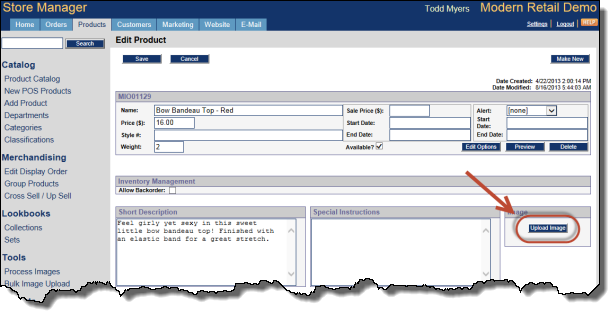
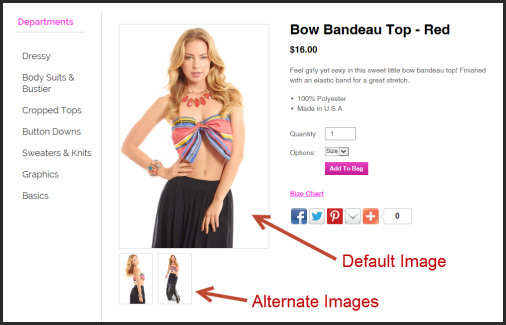
On the Image Upload page the only image that's required is the Default Image. Click on this first Upload button to upload the default image for your product.

After you locate the image on your computer and hit open, the image will immediately start uploading to Store Manager.
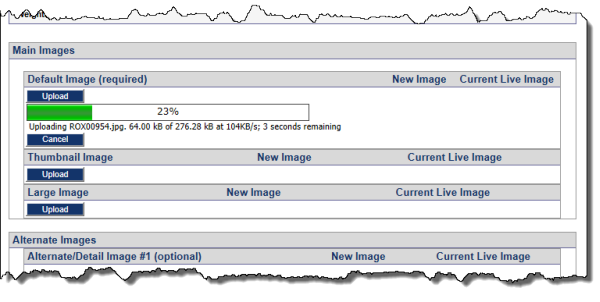
Once uploaded this main Default Image will be also be shown under the Thumbnail Image and Large Image sections. While you could replace these images with different images, most retailers prefer all three of these images to be the same.
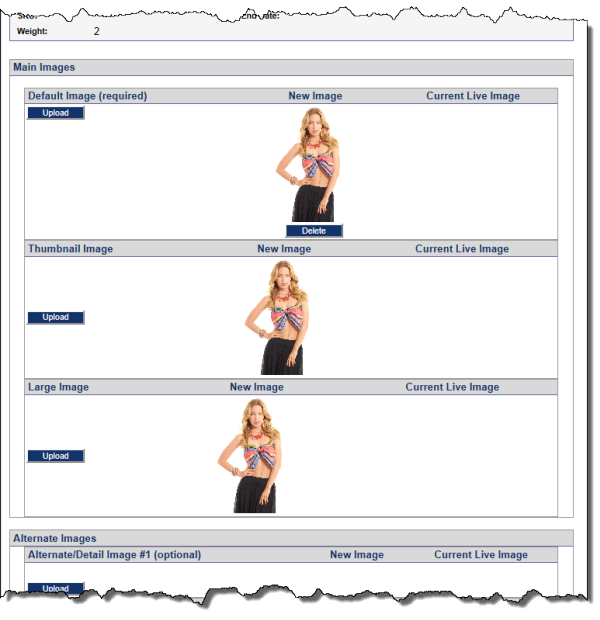
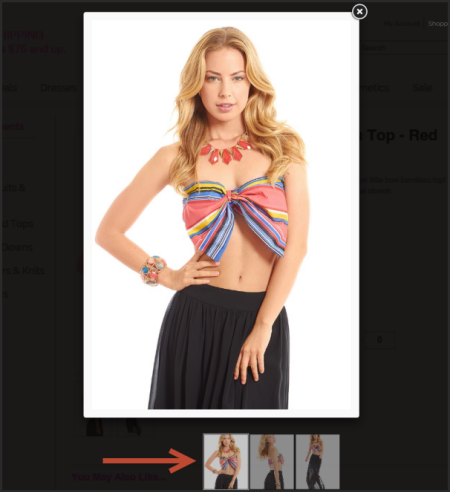
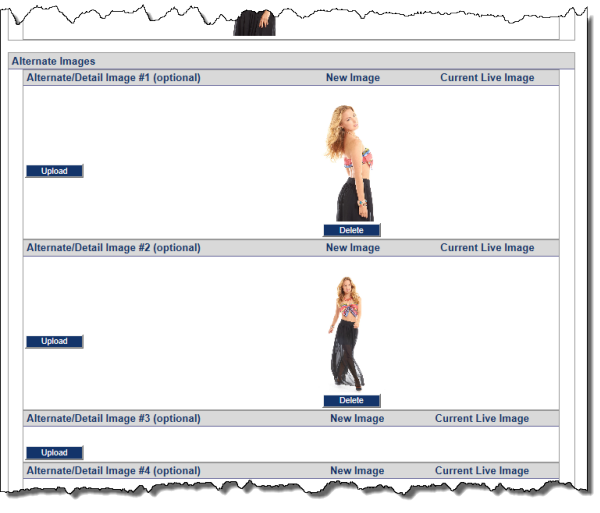
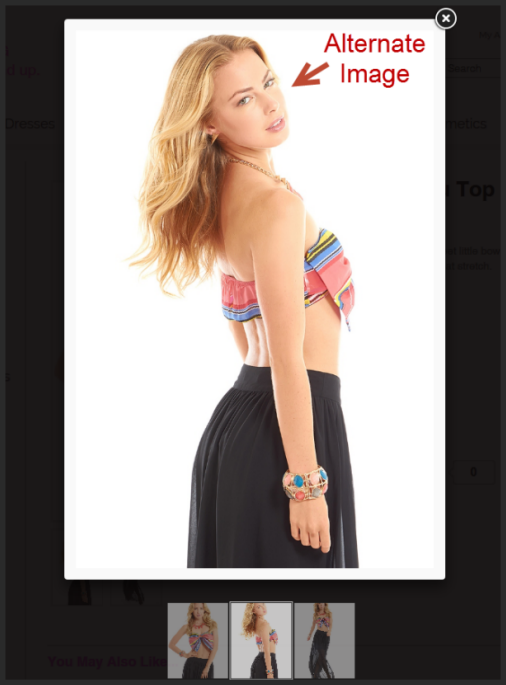
You can also choose to upload one or more Alternate Images. These images are oftentimes used to show side, detail or other views of your products.
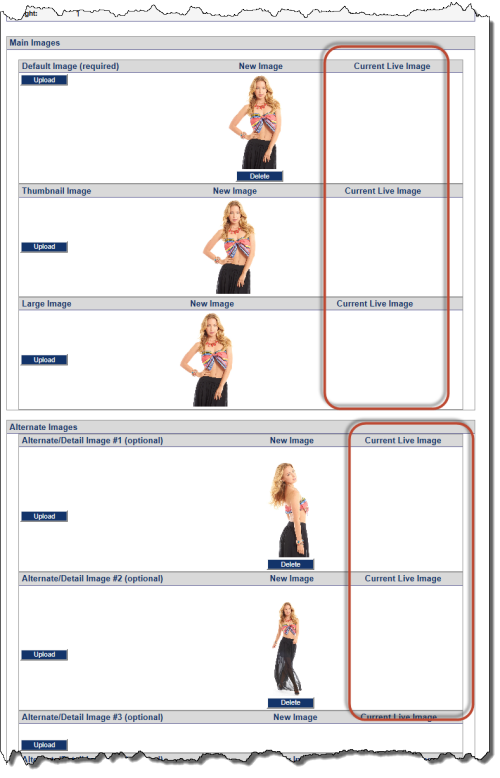
Now you have uploaded all your images you'll notice they are sitting on the left and have not yet moved to right or Current Live Image. In order to make your images live you need to process them in Store Manager.
|
Store Manager also has the ability to upload your images in bulk. This "Bulk Image Upload" feature can save you a lot of time because it allows you to upload a hundred or more images at a time. |
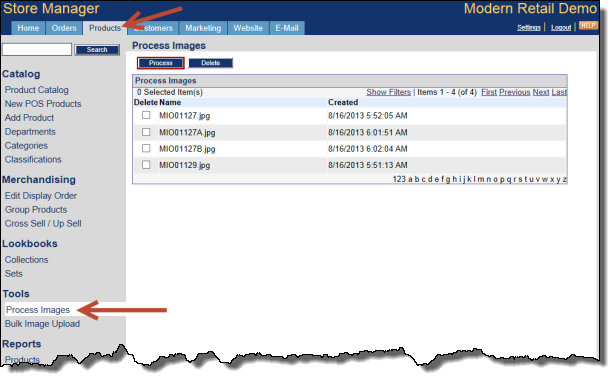
Process Images
New customers often miss the Process Image step when uploading new images to their catalog. This is an important step because your products will not show up on your website until they are processed. In addition to making your images live, this step also resizes and optimizes the images for the best possible viewing experience for shoppers coming to your site.
You can find the Process Images page under Products > Tools in Store Manager. Once there simply click on the Process button at the top of the page to process your images.
Website
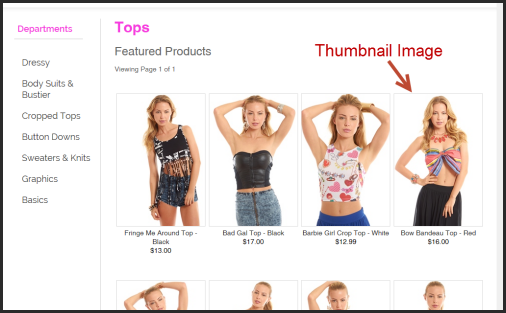
Here's some examples of where these images Default, Thumbnail and Large Images will show up on your website.
|
Your actual website may be slightly different depending upon your design. However, the general layout and placement of these images will most likely be close to these examples. |

Frequently Asked Questions
Here are some frequently asked questions about images and image processing.
-
Are you saying I must crop all of my images to a consistent size?
- No you are not required to upload consistently-sized images. However, most retailers prefer the look when all the images on their site are consistent.
-
Do you support PNG, GIF or TIFF images in the product catalog?
- The only image format we support today is JPG.
-
Can we use image that are supplied by our vendors or designers?
- Absolutely. However, just be aware the images on your website will vary in consistency because each vendor will shoot their photography differently. As explained above, you probably will need to crop some of these images to produce consistently-sized images on your site. Using vendor-supplied images is a great way to go as you get started with your new website. As you website grows you can always replace these images with those you shoot yourself.
-
What size should I upload my images at?
- You'll want to upload all images to Store Manager at 1200 pixels wide if possible. This will produce the best results and won't take you too long to upload the photo to Store Manager.
-
Where can I find a list of the images I am currently working with?
- Under Store Manager>Products>Reports>Products there are three sections, Images Needed, Pending Image Processing, and Newly Added. You will only be able to see 15 images at a time under Images Needed, hit next to see the next 15. The information included in these sections are ID, Name, SKU, Price Date Created, Image, and Options.
Additional References
-
Product Photography for Retailers
-
Photography Q & A: Lights and Backdrops
-
The Photographic Principal – Rule of Thirds
-
Photography Q & A: Shooting Tips