Overview
Slideshows are a perfect way to keep your site fresh and link customers to areas within your site you'd like to highlight. We've installed a plugin, Meteor Slides, which allows you to easily add or remove images.
Log into WordPress, click on Slides. You will see the following Options:
- Slides
- Add New
- Slideshows
- Settings

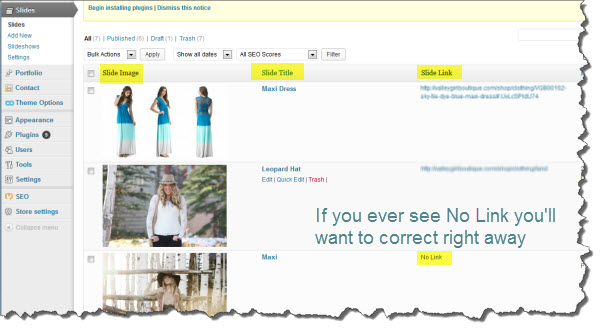
Slides
When you click on slides you will see all the slides that are currently in your slideshow or any drafts you might have. This overview is a great way to see the Slide Titles as well if the slide has a link. (All slides should link to an area in your site)
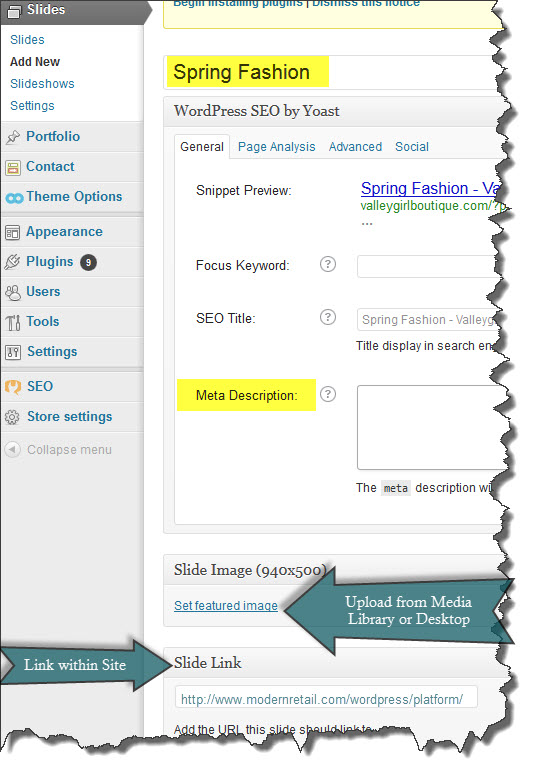
Add New
Adding a New Slide is easy. Simply click on Add New and follow these steps:
- Enter the Title of the Slide
- Fill out SEO by Yoast Meta Description - just a quick sentence about the slide.
- Set Featured Image (Be sure the slide is already cropped to the correct size)
- Add a Slide Link
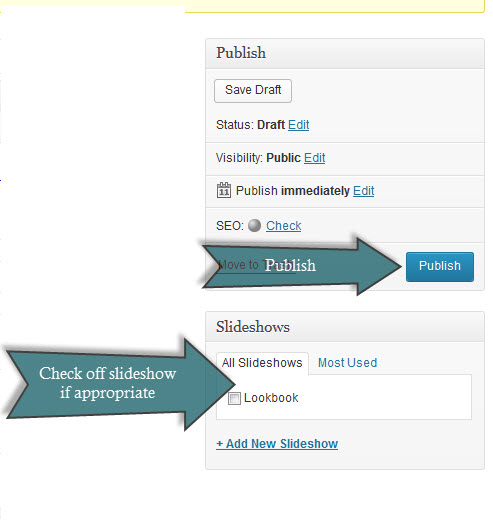
- If you have multiple slide shows check off the appropriate slideshow. (If no Slideshows are listed then you can skip this step)
- Publish
- Go to the live site to view the new slide
Settings
The settings show you what the height and width the slides should be, the transition style and navigation.

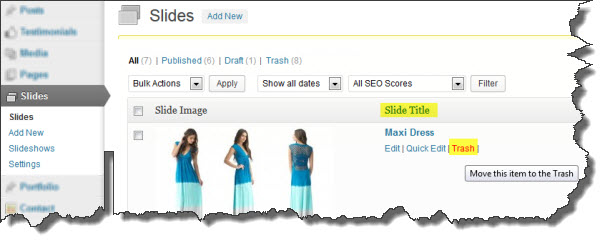
Delete a Slide
To delete a slide go to Slides > Hover over the Slide Title > Click Trash
Slide Show Shortcode
When using just one slideshow here's the appropriate shortcode:
[meteor_slideshow]
For more information here's a video that gives a great step-by-step tutorial. The first minute or two of the video is about installing the plug-in; you can skip that.